Surface-Mounted Locks on Casement Windows: Installation Guide
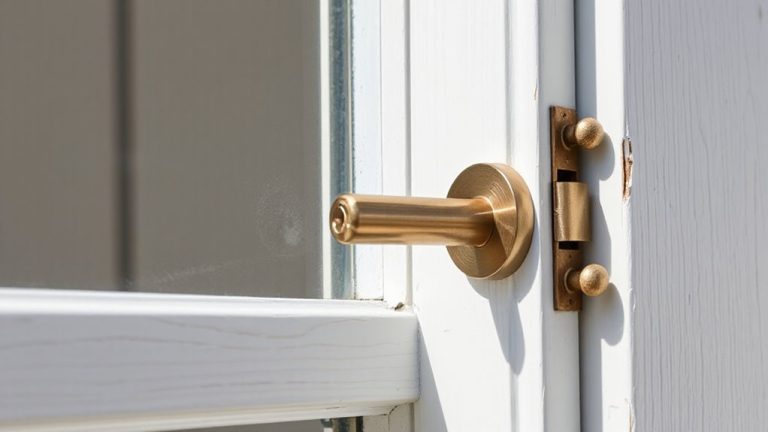
You’ll need a drill, screwdriver, measuring tape, level, and weather-resistant screws. Pick a brass or stainless steel surface-mounted lock for durability. Center it on the meeting stile, about 4 inches from the top or bottom. Mark and pilot holes to prevent splitting. Secure the base plate, then align the strike plate so the latch engages smoothly. Check for flush closure. Adjust if binding occurs. Proper alignment guarantees lasting security and function. The next steps reveal how to fine-tune performance and solve common issues.
Notable Insights
- Choose a weather-resistant surface-mounted lock made of brass or stainless steel for durability and corrosion resistance.
- Position the lock centered on the meeting stile, about 4 inches from the top or bottom for optimal handle alignment.
- Use a level and measuring tape to mark the base plate location accurately and ensure symmetrical alignment.
- Pilot-drill holes before securing the base plate to prevent material splitting and ensure a flush, stable fit.
- Align the strike plate so the latch engages smoothly, then drill pilot holes and secure with matching corrosion-resistant screws.
Gather Your Tools and Materials
A well-stocked toolbox sets the foundation for a secure installation. You’ll need a drill, screwdriver, measuring tape, pencil, level, and appropriate screws for your window frame material. Choose hardware rated for outdoor use to guarantee weather resistance and lock stability over time. Stainless steel or brass fittings resist corrosion, especially important if your window faces rain or humidity. Check that the lock kit includes all mounting components-missing parts delay progress. Inspect each piece for defects before starting. A poorly secured lock reduces effectiveness, so always prioritize tight fits and solid anchoring. Use a level to align parts correctly; misalignment causes uneven pressure and weakens performance. Planning now prevents errors later. Quality tools and materials don’t guarantee success, but they markedly improve outcomes. Invest time in gathering reliable supplies-your home’s security depends on these details. For optimal protection, consider installing best window locks that match your home’s security needs and window type.
Pick the Right Surface-Mounted Lock for Your Window
You’ve got your tools ready and the window surface prepped-now it’s time to choose a surface-mounted lock that matches both your window style and security needs. Focus on material durability: brass and stainless steel offer strong resistance to wear and corrosion, especially in humid or coastal areas. Avoid plastic or low-grade zinc if security is a priority. Check the lock finish too-satin nickel or powder-coated options resist fading and fingerprints, keeping your window looking neat over time. Make sure the lock design fits your casement’s opening mechanism; some models work better on outward-opening windows. Consider multi-point locks for added stability, though they may cost more. Always read manufacturer specs for proper fit. A well-chosen lock boosts security without ruining your window’s appearance. Spend a bit more for quality-you’ll get longer life and better performance.
Mark the Lock Position Correctly
Where should the lock go for maximum security and smooth operation? You want it centered on the meeting stile, aligned with the window’s closed position. Proper placement guarantees even pressure and reliable latching. Use window symmetry as your guide-both sashes should meet evenly, with no gaps or misalignment. Mark the spot where the lock body will sit, typically about 4 inches from the top or bottom, depending on handle height. Check hinge balance, too; if the window sags or binds, correct that first or the lock won’t engage properly. Use a level and measuring tape for accuracy. A misaligned mark leads to poor function and wear over time. Double-check your measurements before making any permanent marks. This step isn’t just about placement-it’s about guaranteeing long-term performance, security, and ease of use. Accuracy now prevents issues later.
Mount the Base Plate on the Frame
Now that you’ve marked the lock position with precision, double-checking alignment and symmetry, it’s time to attach the base plate to the frame. Position the plate over your marks, making certain it sits flat against the surface, then pilot-drill holes to prevent wood splitting. Use the manufacturer’s recommended screws-shorter ones may compromise material durability, while overly long screws can interfere with window operation. Tighten with consistent installation torque; under-tightening risks looseness, while over-tightening damages threads or warps the plate. Stainless steel or brass hardware boosts longevity, especially in humid environments. Confirm the plate doesn’t shift during screwing, as realignment later reduces effectiveness. Proper fastening guarantees reliable engagement with the lock mechanism. Check fit once secured-no gaps or wobbling. This step lays the foundation for secure, smooth operation, so take care to get it right before moving forward.
Fit the Strike Plate to the Surface-Mounted Lock
The lock’s effectiveness hinges on a properly aligned strike plate, so take time to position it precisely where the latch engages. Hold the strike plate in place and mark the screw holes with a pencil. Drill pilot holes slightly smaller than the screws to prevent splitting the frame. Secure it firmly, guaranteeing the latch slides in smoothly without forcing. Choose a strike plate with material durability matching your lock-brass or stainless steel resists wear and corrosion. Check finish compatibility between the strike plate and lock body to maintain a uniform look and avoid galvanic corrosion over time. A mismatched finish may degrade faster, especially outdoors. Position is critical: even a 1/16-inch misalignment can hinder function. Use the manufacturer’s template if provided. Tighten screws fully, but don’t over-torque. This small part carries heavy daily use, so precise installation guarantees long-term reliability and security.
Test the Lock for Flush, Smooth Closure
Once you’ve secured the strike plate, close the window slowly to see if the latch meets the strike plate without resistance, since even slight misalignment can cause binding or incomplete locking. Check that the window closes flush-any gap may compromise weather sealing and security. Perform operation testing by locking and locking several times to confirm smooth function. The latch should click securely into place with no need for excessive force. If the window doesn’t seal tightly, outdoor air and moisture could enter, reducing energy efficiency. Verify the seal remains consistent around the entire frame when closed. Don’t skip repeated testing under normal conditions, as inconsistent operation can indicate instability over time. Proper alignment supports both security and long-term performance, especially in areas with temperature swings or high humidity. A well-fitted lock enhances safety without sacrificing ease of use.
Fix Common Fit and Alignment Problems
If the test closure showed gaps, resistance, or inconsistent locking, you’re likely dealing with fit or alignment issues that need immediate attention. Common causes include window warping or hinge misalignment, both of which affect how the sash meets the frame. To correct this, first check hinge placement-loosen screws slightly and reposition the sash for better contact.
| Issue | Likely Cause | Quick Fix |
|---|---|---|
| Gaps at latch | Window warping | Sand or plane high spots |
| Stiff operation | Hinge misalignment | Adjust or shim hinge mounts |
| Incomplete locking | Misaligned strike | Re-drill or reposition strike plate |
After adjustments, retest the closure and locking function. Even minor misalignments compromise security and weather resistance. Address these early to guarantee long-term performance and durability of your surface-mounted lock system.
On a final note
You’ve installed the surface-mounted lock correctly if it allows smooth, flush closure without sticking. Double-check alignment, tighten screws, and guarantee the strike plate engages securely. These locks are affordable and easy to install, but less secure than built-in options. For better protection, pair with window sensors. Regular maintenance keeps it working well. Choose sturdy models for long-term use.