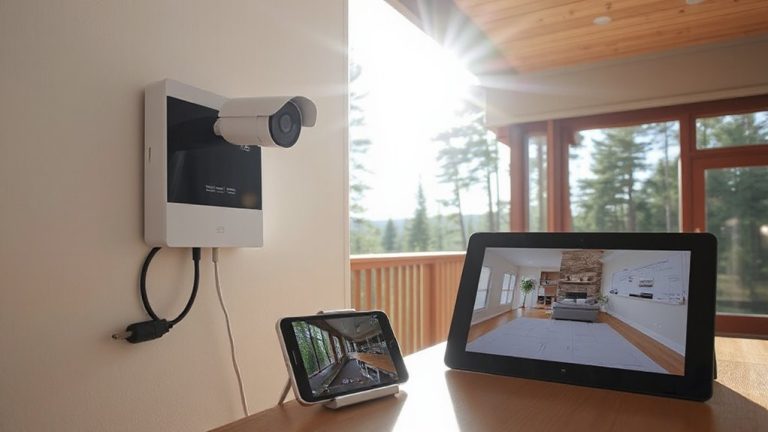
Understanding Bandwidth Requirements for Seamless Cloud Uploads From Home Surveillance Systems
Your upload speed needs depend on how many cameras you have, their resolution, frame rate, and compression. A single 1080p camera using H.264 typically needs 2–3 Mbps, while 4K can require 6–8 Mbps. Higher frame rates or inefficient compression double bandwidth use. For four cameras, aim for at least 12–15 Mbps upload, with 20% extra headroom. Older routers or network congestion can throttle performance, so guarantee Wi-Fi 5 or better and consider wired connections. Switching to H.265 cuts bandwidth nearly in half, and local storage avoids upload limits entirely-something worth exploring if cloud uploads keep failing.
Notable Insights
- Higher video resolution and frame rates significantly increase bandwidth needs; 4K at 30 fps can use up to 4 Mbps per camera.
- Use H.265 compression to reduce bandwidth usage by up to 50% compared to older H.264 encoding.
- Calculate total upload needs by summing each camera’s bandwidth and adding 20% overhead for reliability.
- Upgrade to a high-upload-speed internet plan, such as 100 Mbps with 20 Mbps upload, for seamless cloud streaming.
- Opt for local storage like NVRs or microSD cards to avoid cloud upload limits and reduce ongoing costs.
How Much Upload Speed Does Your Camera Need?
How much upload speed do you really need for your security camera to work well? It depends on your cloud resolution and how efficiently video compression reduces data size. For 1080p footage with good compression like H.264, you’ll need about 2–3 Mbps per camera for smooth uploads. Higher cloud resolution, like 4K, demands 6–8 Mbps unless advanced compression like H.265 is used, cutting bandwidth nearly in half. Multiple cameras multiply needs, so a four-camera system at 1080p could require 8–12 Mbps total upload speed. Most home internet plans list download speeds prominently, but upload speeds are often much lower-check your plan to avoid bottlenecks. Insufficient upload speed causes lag, dropped frames, or failed cloud backups. Aim for at least 20% overhead above your calculated needs. Prioritize cameras with strong video compression and adjustable cloud resolution to match your bandwidth.
What’s Eating Your Bandwidth? Camera Settings That Multiply Uploads
Why does your security camera sometimes upload more data than expected? It’s likely due to high camera resolution and frame rate settings. The higher the resolution, the more detail each image contains-and the larger the file size. Similarly, a higher frame rate means more images are captured per second, multiplying the amount of data sent to the cloud. For instance, shooting at 1080p vs. 720p can nearly double bandwidth use, while increasing frame rate from 15 to 30 frames per second also doubles upload demands. Even motion-triggered recording can generate large uploads if settings are too sensitive. To manage bandwidth, consider lowering resolution on less critical cameras or reducing frame rate in low-activity areas. These tweaks reduce strain on your internet without sacrificing essential coverage. Always balance quality with your upload limit to guarantee smooth, uninterrupted cloud backups. Choosing models with efficient compression like H.265 can further optimize best Wi-Fi cameras for lower bandwidth usage.
Calculate Bandwidth for 4, 8, or 16 Cameras
A typical home security setup with 4 to 16 cameras can use anywhere from 4 to 64 Mbps of upload bandwidth, depending on resolution, frame rate, and compression. You’ll need to take into account both camera resolution and frame rate when estimating your needs. For example, a 1080p camera at 15 frames per second uses about 1 Mbps, while a 4K camera at 30 fps can use up to 4 Mbps. Multiply that per camera, and your total demand adds up fast. With 8 cameras at 4 Mbps each, you’re using 32 Mbps-nearly half of a 75 Mbps plan. Higher resolution and frame rate improve video clarity but increase bandwidth. Plan accordingly: if you run 16 cameras, even at medium settings, you likely need 50+ Mbps upload speed. Check your internet plan’s upload specs and leave room for other devices, too.
Why Your Router Might Be Sabotaging Your Cameras
| Factor | Impact on Cameras | Recommendation |
|---|---|---|
| Old firmware | Slower data flow | Check for updates monthly |
| Signal interference | Poor connection | Use 5 GHz band where possible |
| Router age | Limited throughput | Replace every 3–5 years |
Ensure your router supports modern standards like Wi-Fi 5 or Wi-Fi 6, and position it centrally to minimize dead zones. Regular maintenance and strategic placement go a long way in maintaining reliable camera performance. Adding a WiFi extender for Ring cameras can significantly improve signal strength in areas where your camera struggles to stay connected.
Upgrade Your Internet or Switch to Local Storage?
If your cameras consistently struggle to upload footage, you’re likely facing a bandwidth bottleneck that demands a practical solution-either upgrading your internet plan or switching to local storage. Consider a cost comparison: higher-tier internet plans improve upload speeds but increase monthly bills, while local storage alternatives like NVRs or microSD cards have minimal ongoing costs. A 100 Mbps plan with at least 20 Mbps upload supports multiple cloud cameras, but if your usage exceeds data caps, fees may apply. Local storage avoids bandwidth limits entirely and provides faster access to footage, though it lacks cloud redundancy. Evaluate your system’s data needs and retention goals. If reliable upload speeds aren’t feasible or cost-effective, local storage is a viable, scalable alternative that maintains performance without depending on your internet. For those considering local storage, investing in a reliable NAS device can offer both scalability and enhanced data protection.
Test Your Upload Speed in 3 Minutes
Before committing to a new internet plan or switching your security system to local storage, check what you’re actually working with-your current upload speed. Run a speed test using a trusted tool like Speedtest by Ookla or Fast.com. Do this during typical usage times to capture real-world performance. Note both upload speed and network latency, as both impact cloud uploads. High latency can delay video transmission, even with decent speeds. Below are sample results from different home networks:
| Time of Day | Upload Speed (Mbps) | Network Latency (ms) |
|---|---|---|
| 7:00 AM | 28.4 | 22 |
| 12:00 PM | 15.1 | 45 |
| 6:00 PM | 8.3 | 98 |
| 9:00 PM | 6.7 | 112 |
| 3:00 AM | 30.0 | 18 |
For reliable cloud backups, aim for at least 10 Mbps upload and latency under 50 ms.
Fix Failed Cloud Uploads: A Step-by-Step Checkup
While your internet may seem fast enough for everyday use, slow or failed cloud uploads often stem from overlooked issues in your network setup or device configuration. Start by rebooting your router and surveillance device-simple, but effective. Check for firmware updates on your camera; outdated software can hurt cloud reliability. Next, guarantee your upload speed meets the minimum requirement for continuous video streaming-typically 5 Mbps per camera for 1080p quality. Weak Wi-Fi signals cause spotty upload consistency, so place devices close to the router or use wired connections. Confirm your cloud storage plan is active and hasn’t hit its limit. Finally, review app logs for error timestamps-these clues help pinpoint when and why uploads fail. A few quick checks improve performance and guarantee your footage reaches the cloud reliably.
On a final note
You need stable upload speed for reliable cloud uploads, especially with multiple cameras. High resolution and frequent motion triggers increase bandwidth use. Test your upload speed first-most homes need at least 10–20 Mbps for 4–8 cameras. If your internet falls short, adjust camera settings or consider local storage. Routers matter too-place them centrally and update firmware. Upgrade your plan if needed, but weigh costs against benefits.