How to Mount a PTZ Camera on a Ceiling (Step-by-Step)
Center your PTZ camera on the ceiling for full 360-degree coverage, avoiding beams, vents, or lights that block movement. Use a stud finder and secure the mount with screws or toggle anchors rated for the camera’s weight. Run shielded PoE cables through walls or conduits to reduce interference. Connect power and data, then attach the camera securely, guaranteeing it moves freely. Test pan, tilt, and zoom, set range limits, and adjust presets-fine-tuning guarantees reliable surveillance.
Notable Insights
- Choose a central ceiling location to maximize 360-degree coverage and minimize blind spots or obstructions.
- Ensure the ceiling can support the camera by using studs or appropriate anchors for secure mounting.
- Install the mounting plate level and secure it with screws or anchors rated for the camera’s weight.
- Run shielded power and data cables through walls or conduits to reduce interference and maintain a clean appearance.
- Attach the camera, test full pan, tilt, and zoom ranges, and set limits to prevent mechanical strain.
Choose the Best Ceiling Spot for 360-Degree PTZ Coverage
Where should you place your PTZ camera to get full 360-degree coverage without blind spots? Center the camera on the ceiling for best field of view and minimal obstructions. This position allows the camera to pan, tilt, and zoom seamlessly in all directions, reducing blind spots greatly. Avoid placing it near vents, beams, or ceiling fixtures that can block movement or create shadows. Pay attention to camera aesthetics-positioning it centrally not only improves functionality but also creates a cleaner, more professional look. Keep it away from sources of signal interference, like fluorescent lights or Wi-Fi routers, to maintain stable transmission. Mounting too close to metal structures can also weaken the signal. For best results, test the proposed location with a temporary setup before final installation. This guarantees full coverage and avoids costly adjustments later. Planning now saves time and improves overall surveillance effectiveness.
Gather Tools and Cables for PTZ Camera Mounting
You’ve picked the ideal ceiling spot for full 360-degree coverage, so now it’s time to prepare the tools and cables needed for a secure and efficient PTZ camera installation. Use the right equipment to save time and avoid mistakes.
| Tool/Cable | Purpose | Recommendation |
|---|---|---|
| Drill and drill bits | Create pilot holes in ceiling | Use masonry bits for concrete |
| Wire strippers | Expose wiring for secure connections | Guarantee clean cuts, no damage |
| Mounting screws, power cable, network cable | Secure mount and enable operation | Check camera specs for gauge |
Having these on hand guarantees a smooth setup. Drill bits must match your ceiling type-wood, drywall, or concrete. Wire strippers prevent frayed wires that could disrupt signal or power. Test all cables before installation to catch defects early. Plan cable routes to minimize visibility and interference. For reliable power and data transmission, consider using a PoE security camera system that integrates seamlessly with your network setup.
Install the Mounting Plate on the Ceiling
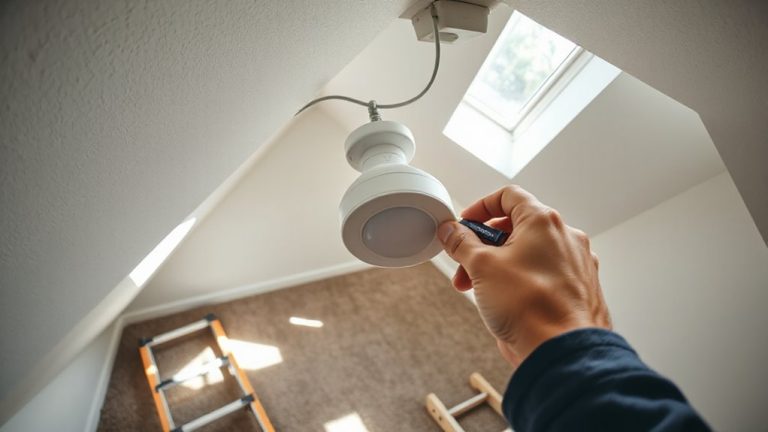
Once you’ve selected the ideal ceiling location for unobstructed 360-degree coverage, it’s time to attach the mounting plate securely. First, check for ceiling reinforcement-especially in drywall or drop ceilings-to guarantee the mount can support the camera’s weight. Use a stud finder or toggle anchors if joists aren’t accessible. Mark drill points carefully, making sure the mounting plate stays level. Proper mount alignment is key; even a slight tilt can limit the camera’s pan and tilt range later. Hold the plate steady and drill pilot holes to prevent cracking. Then fasten it with the included screws or anchors rated for the camera’s load. Double-check tightness and alignment with a bubble level. A stable, correctly aligned base guarantees smooth operation and maximizes field of view, giving your PTZ camera reliable performance for long-term surveillance.
Run and Connect Power and Data to the PTZ Camera
With the mounting plate securely fastened and properly aligned, your next step is running the power and data lines to the PTZ camera. Use shielded cables to reduce signal interference and guarantee reliable video transmission. Plan your cable path carefully-conceal wires through walls or conduits when possible for safety and aesthetics. Always include camera grounding to protect against electrical surges and maintain system stability. For outdoor installations requiring continuous power, consider integrating a solar cellular security camera system to eliminate reliance on traditional power sources.
| Cable Type | Pros | Cons |
|---|---|---|
| PoE Ethernet | Delivers power and data in one cable; reduces clutter | Requires compatible network equipment |
| Siamese Cable | Supports analog and power; durable | Bulkier; harder to conceal |
| Fiber Optic | Long-distance; immune to interference | Expensive; needs converters |
| Wireless | No cabling needed | Latency; less reliable |
| Coaxial | Stable signal | Needs separate power line |
Connect cables as specified, avoiding sharp bends.
Attach the PTZ Camera and Set Its Range of Motion
Proper alignment of the PTZ camera on its mounting plate guarantees stable performance and full access to its pan, tilt, and zoom functions. Secure the camera firmly, guaranteeing camera alignment is centered and balanced to prevent strain on moving parts. Double-check that the mount allows unobstructed movement across all axes. You’ll need to set physical limits for pan and tilt to define the camera’s range, which supports effective motion calibration later. These stops prevent the camera from hitting obstacles or over-rotating, which could damage internal mechanisms. Make sure the range covers your intended surveillance zone without gaps. Use the manufacturer’s guidelines to position the stops accurately, as precise setup now improves automated tracking and preset positioning later. Take time to verify angles with a level, if needed, so performance remains consistent. Correct setup guarantees reliable, full 360-degree coverage.
Test Pan, Tilt, and Zoom Functions
Start by powering on the camera and using the扫黑除 interface-whether software, remote, or mobile app-to check each motion function. Move the camera left and right to verify full 360-degree pan coverage, then test tilt up and down to confirm vertical range. Use zoom controls to guarantee clarity at various distances without lag or distortion. These checks are essential for accurate camera calibration. Test motion tracking by walking through the field of view; the camera should follow smoothly without losing alignment. Make small adjustments if delays or jerky movements occur. Confirm that saved presets align with actual positions. Proper calibration guarantees reliable surveillance and maximum motion tracking performance. Always perform these tests before finalizing installation. Recheck periodically, especially after firmware updates or physical bumps to the mount. This routine helps maintain consistent monitoring and prevents coverage gaps over time.
On a final note
You’ve now securely mounted your PTZ camera for full 360-degree coverage. Proper placement guarantees no blind spots, while correct wiring supports reliable power and data flow. Test all pan, tilt, and zoom functions to confirm smooth operation. This setup offers wide-area monitoring with remote control flexibility, ideal for home security. Consider a model with motion detection and night vision for better performance. Regular checks maintain long-term effectiveness.