How to Install Outdoor Surveillance Cameras for Optimal Coverage and Deterrence
Start by mapping your property’s entry points and blind spots to target key areas like doors, windows, and driveways. Choose cameras with 1080p or 4K resolution, night vision, and weather resistance (IP65 or higher). Use wired systems for reliability or wireless for easier setup. Mount cameras 8–10 feet high at a 15–20 degree angle to capture faces and deter intruders. Proper placement and overlapping coverage reduce gaps-ensuring clear, consistent footage no matter the conditions. You’ll find setup details and model comparisons that match your home’s layout and security needs just ahead.
Notable Insights
- Identify and map all entry points and blind spots to plan strategic camera placement.
- Choose high-resolution, weather-resistant cameras with night vision for reliable outdoor performance.
- Prefer wired systems for stable power and connectivity, or wireless for easier installation.
- Mount cameras at 8–10 feet high with a 15–20 degree downward angle for optimal coverage.
- Position cameras to cover entry points, avoid glare, and use overlapping fields to eliminate blind spots.
Assess Your Property’s Vulnerable Entry Points
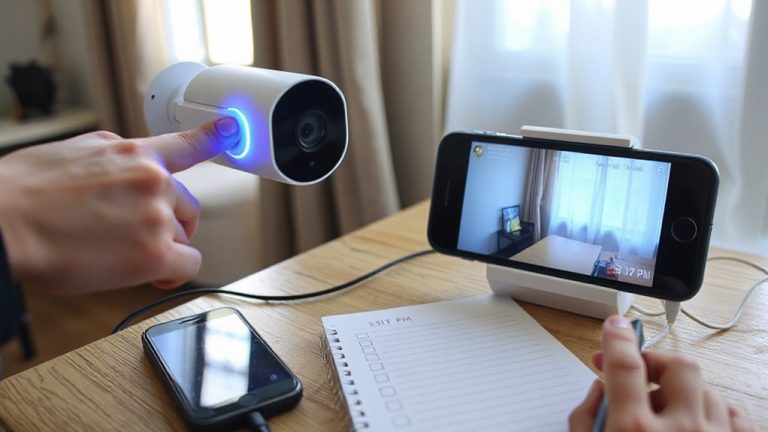
Your home’s security starts with knowing where it’s most exposed. Walk around your property and identify all possible entry points-doors, windows, garages, and side gates-since these are common targets. Don’t overlook less obvious spots like basement windows or sliding glass doors, which intruders often exploit. Pay close attention to blind spots, areas not visible from the street or where foliage creates cover. Trim shrubs and adjust outdoor lighting to reduce concealment. Use a notebook or phone to sketch a simple layout, marking each entry point and blind spot. This assessment helps you plan camera placement effectively, ensuring no critical area is missed. Reliable data shows most break-ins occur through ground-level access points, making thorough evaluation essential. A clear map of vulnerabilities improves overall coverage and strengthens deterrence, giving you actionable insight before purchasing or installing equipment. Choosing models with high resolution and weather resistance ensures reliable performance in critical areas with best outdoor security cameras.
Choose the Best Outdoor Surveillance Camera Type
While budget and layout matter, selecting the right type of outdoor surveillance camera ultimately depends on your security goals and environmental conditions. You’ll want to take into account camera resolution first-higher resolution like 1080p or 4K delivers sharper images, making it easier to identify faces or license plates. If your area has poor lighting conditions, choose a model with infrared night vision, wide dynamic range, or color night capability to maintain visibility. For open spaces, a pan-tilt-zoom (PTZ) camera offers broad coverage, while fixed-lens models work well for focused entry points. Weather-resistant housing (IP65 or higher) secures durability. Bullet cameras suit long-range viewing, and dome cameras resist tampering. Ultimately, match camera resolution and lighting conditions to your site’s needs, balancing performance with practicality. For reliable performance and expert-tested options, consider checking out the best outdoor security cameras.
Power and Connect Your System (Wired vs. Wireless)
When setting up your outdoor surveillance system, choosing between wired and wireless power and connectivity impacts reliability, installation complexity, and long-term maintenance. Wired systems use a direct power source and Ethernet cables, offering consistent signal stability and uninterrupted operation, ideal for long-term use. They require more effort to install, often needing professional help, especially when running cables through walls or trenches. Wireless cameras rely on batteries or solar panels for power source and connect via Wi-Fi, making installation simpler and less invasive. However, they may experience signal stability issues due to interference or weak networks. Battery models need regular recharging, increasing maintenance. Wired setups typically cost more upfront but offer better performance over time. For dependable, high-quality surveillance, wired is usually best. For reliable performance, consider a best wired security camera system that suits your coverage needs.
Place Cameras for Maximum Coverage and Deterrence
Since camera placement directly affects both security effectiveness and crime prevention, positioning them to cover key entry points like doors, windows, and driveways makes the most sense. Proper camera placement guarantees you capture clear footage of anyone approaching your home. It also creates visual deterrence-visible cameras discourage potential intruders who don’t want to be recorded. Focus on high-traffic areas and blind spots where someone could hide. Avoid placing cameras where lighting causes glare or shadows, since poor image quality reduces usefulness. Overhangs and corners are ideal spots to mount units discreetly yet effectively. Remember, overlapping zones increase coverage and reduce gaps. A well-planned system uses fewer cameras efficiently. Investing time in smart layout improves both monitoring and prevention. Visual deterrence works best when intruders know they’re being watched-so avoid hiding all cameras out of sight.
Mount at the Right Height and Viewing Angle
Height and angle make a big difference in how well your cameras perform. Mount your camera 8 to 10 feet high-this range offers clear facial shots while making tampering harder. Aim slightly downward, around 15 to 20 degrees, to cover entry points without blind spots. This angle improves facial recognition and reduces glare from weather or sunlight. Proper camera stability is essential, so use sturdy mounts and secure fixtures that resist vibration or wind. Wobble leads to blurry footage. Always plan for cable management: route wires through conduit or use weather-resistant clips to protect lines and keep them hidden. Exposed cables are easy to cut and look messy. Good cable management also prevents strain on connections, extending camera life. Test the view before final tightening-ensure no obstructions like trees or signs block key areas. Adjust as needed for full coverage.
Check Night Vision and Weatherproofing Before Installation
Though you’ve picked the ideal spot and set the right angle, don’t skip verifying your camera’s night vision and weather resistance before mounting it for good. Check the infrared sensitivity to guarantee clear footage in total darkness-most reliable models offer 30 to 60 feet of night vision range. If your property has deep shadows or distant corners, confirm the camera’s IR LEDs are strong enough to cover those areas. Also, assess housing durability; outdoor cameras must withstand rain, snow, heat, and impacts. Look for an IP65 rating or higher to guarantee dust and water resistance. Cheaper models may skimp on sealing or materials, leading to early failure. Avoid plastic housings that yellow in sunlight. Metal or high-grade polycarbonate lasts longer. Test these features indoors first-shining a light won’t hurt, but mounting a camera twice will cost time and effort.
Test Your Outdoor Surveillance Cameras for Clear Footage
Your camera’s performance hinges on clear, reliable footage, so put it to the test before finalizing the setup. Check video clarity during daylight and low-light conditions by reviewing recorded clips on your app or monitor. Walk through key zones to verify motion detection responsiveness and guarantee no blind spots exist. Adjust angle or height if needed. Below is a quick reference for evaluating performance:
| Feature | What to Test | Ideal Result |
|---|---|---|
| Video Clarity | Resolution, focus, field of view | 1080p or higher, sharp details |
| Motion Detection | Sensitivity and range | Triggers accurately within 20–30 ft |
| Night Footage | Low-light playback | Clear B&W or color, no blur |
| App Alerts | Notification speed | Delivered within 5–10 seconds |
Fine-tune settings to reduce false alarms. Confirm video clarity and motion detection meet your security needs before mounting permanently.
On a final note
You’ve now assessed entry points, chosen the right camera type, and decided between wired or wireless based on reliability and cost. Mount cameras 8–10 feet high with wide angles to cover all critical zones, ensuring night vision and weatherproofing meet IP65 or higher. Test footage for clarity and adjust as needed. Proper placement deters intruders and captures usable evidence, making your system effective, reliable, and worth the investment.