Sync IP Cameras to an Alarm Dashboard: Setup Guide
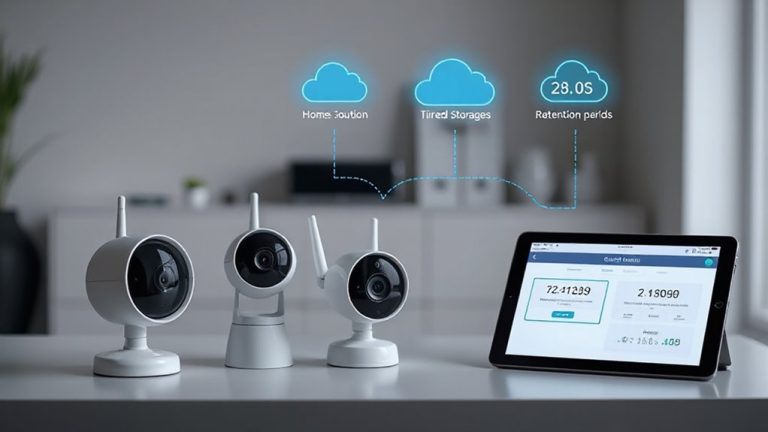
Connect your IP cameras to a centralized platform that supports seamless syncing, encrypted cloud storage, and motion alerts. Assign static IPs to each camera to prevent disconnects and guarantee stable network communication. Position cameras at entry points with overlapping views and set motion zones to reduce false alarms. Test live feeds for clarity and confirm alarm notifications work. Sync device clocks for accurate timestamps. You’ll discover deeper insights with the right setup.
Notable Insights
- Choose a centralized monitoring platform that supports multi-camera sync and integrates with an alarm dashboard for unified alerts.
- Assign static IP addresses to each camera to ensure reliable connectivity and prevent disruptions in alarm system communication.
- Position cameras to cover all entry points with overlapping fields of view and optimal height to maximize detection and syncing accuracy.
- Configure motion zones and sensitivity settings to reduce false alarms and ensure only relevant events trigger dashboard notifications.
- Test live feeds, audio detection, and alarm alerts while synchronizing timestamps across all cameras using NTP for seamless dashboard integration.
Choose a Centralized Monitoring Platform
A solid monitoring platform acts as the backbone of any integrated security setup, so choosing the right one matters. You’ll want a system that supports seamless syncing of multiple IP cameras with your alarm dashboard. Look for platforms offering reliable cloud storage-this guarantees footage is saved securely even if a camera is damaged. Make sure the service uses encryption during data transmission and storage. User permissions are equally important; they let you control who sees what. For example, you might give family members view-only access while granting full control to security personnel. Platforms with scalable plans let you add cameras without overpaying. Some charge monthly fees per camera, while others offer flat rates. Check compatibility with your existing devices and verify mobile app performance. Testing a trial version helps assess interface ease and response times before committing. Top-rated systems often include features found in the best home security cameras, such as motion detection accuracy.
Plan IP Camera Placement for Full Coverage
You’ll want to think like an intruder when placing your IP cameras-cover every entry point, including doors, windows, and garage access, while minimizing blind spots. Aim for clear camera angles that capture faces and movement, not just walls or dark corners. Mount cameras at 8–10 feet high for best coverage and tamper resistance. Overlap fields of view slightly to reduce blind spots and guarantee no area slips through the cracks. Avoid backlighting by positioning cameras to face entrances directly. Test views during day and night to confirm visibility. Wide-angle lenses help but can distort-check for detail clarity at a distance. Indoor cameras need fewer weather protections, but outdoor units require IP66+ ratings. Proper placement improves detection accuracy and alarm dashboard alerts, making monitoring more reliable. Plan now to avoid gaps later. For optimal performance in various conditions, choose models listed among the best outdoor security cameras.
Assign Static IPs and Configure Network Settings
Stability starts with control-assigning static IP addresses guarantees your IP cameras stay reachable and responsive on the network. Dynamic IPs can change, causing lost connections and gaps in monitoring. With proper IP addressing, each camera keeps a permanent address, improving network stability and simplifying setup. Access your router’s admin panel, reserve an IP for each camera using its MAC address, and lock in the configuration. This small step prevents confusion during emergencies.
| Scenario | Without Static IPs | With Static IPs |
|---|---|---|
| Camera Connection | May drop or shift | Always predictable |
| Alarm Sync Accuracy | Unreliable triggers | Precise coordination |
| Troubleshooting Time | Lengthy diagnosis | Fast, direct fixes |
You’ll save time during maintenance and guarantee your monitoring dashboard communicates seamlessly with each device. Proper network settings lay the foundation for reliable, long-term security.
Enable Motion Alerts and Reduce False Triggers
When properly configured, motion alerts turn passive cameras into active security tools, letting you respond to real threats instead of guessing what happened. You’ll need to adjust camera sensitivity to match your environment-too high and you’ll get alerts from passing cars or swaying trees, too low and actual intruders might go unnoticed. Most modern IP cameras let you set motion zones, so only specific areas trigger alerts. Use alert filtering to reduce false alarms by ignoring small movements or non-human shapes. This guarantees you’re notified only when it matters. Combine sensitivity settings with smart filtering, and you’ll boost accuracy markedly. While basic filtering is included in most systems, advanced options may require a subscription. Take time to fine-tune each camera, as placement and lighting affect performance. Proper setup means fewer distractions and faster response to real incidents. For optimal results, consider pairing your system with one of the best motion detectors for seamless integration and enhanced coverage.
Connect Cameras to the Monitoring Dashboard
How do you bring your security system together into one functional unit? You start by connecting each IP camera to your centralized monitoring dashboard. First, confirm camera compatibility with your dashboard software-check manufacturer specs or use supported models to avoid integration issues. Then, assign static IP addresses to prevent connection drops. Use wired Ethernet when possible to minimize signal interference, especially in environments crowded with Wi-Fi devices. If you rely on wireless connections, place cameras within ideal range of the router and avoid thick walls or metal obstacles. Keep firmware updated on all devices to guarantee stable performance. A well-connected system reduces lag and downtime. Plan your layout ahead of time, noting cable paths and power sources. Though wired setups cost more upfront, they deliver more reliable data flow. This step guarantees every camera communicates clearly with the dashboard, setting the stage for real-time monitoring and alerts.
Test Live Feeds and Alarm Notifications
Why risk blind spots in your security system? You need to verify every camera’s live feed right after connecting them to the dashboard. Check each camera resolution to guarantee video is clear enough to identify faces or license plates-1080p or higher is ideal. Make sure the feed loads quickly without lag, as delays can undermine response times. Then test alarm notifications by triggering motion alerts or using audio detection features. Walk through monitored zones and confirm your dashboard sends alerts instantly. Guarantee audio detection picks up sounds like breaking glass or loud voices, but avoid overly sensitive settings that cause false alarms. Test both indoor and outdoor cameras under different lighting. Note any weak Wi-Fi signals or obscured views and reposition devices as needed. These steps guarantee reliable monitoring and timely responses.
Update Firmware and Synchronize Device Clocks
Though it might seem minor, keeping your IP cameras’ firmware up to date is essential for both performance and security. Manufacturers regularly release updates to patch vulnerabilities, improve functionality, and support new integrations with alarm dashboards. Without current firmware, your system could experience bugs or fail during critical moments. You should also synchronize all device clocks across your network-time drift can cause mismatched logs and delayed alerts, undermining your monitoring accuracy. Even a few seconds’ delay can make it hard to correlate footage with alarm events. Proper clock sync guarantees timestamps align across cameras and the dashboard. It also supports precise camera calibration, which relies on accurate timing to match motion detection with video feeds. Check your devices monthly, enable automatic updates if available, and use Network Time Protocol (NTP) servers to maintain consistent time. This small step boosts reliability and strengthens your system’s overall effectiveness.
On a final note
You’ve set up your cameras and linked them to a central dashboard, which means you’re now monitoring your property more effectively. Make sure each camera has a static IP, motion alerts are fine-tuned, and firmware stays updated. Synchronized clocks guarantee accurate logs. Check live feeds and test alarms monthly. A well-planned system with reliable equipment pays off in both security and peace of mind over time.