Setting Up Security Camera Triggers Based on Motion Sensor Activation Zones
You can set up motion-triggered camera alerts by defining custom detection zones in your security app. Pick a camera with 1080p resolution and IP65 rating for reliable outdoor use. Focus zones on entry points like doors and driveways, avoiding areas with swaying trees. Adjust sensitivity to reduce false alarms by up to 70%, and test movement at night and during the day. Link zones to alerts and recordings for efficient monitoring. Fine-tune settings as you observe real-world performance.
Notable Insights
- Define custom motion zones in the security app to target areas like doors or driveways for focused trigger activation.
- Use cameras with support for motion zoning and at least 1080p resolution for accurate detection and clarity.
- Position cameras to cover entry points and low-light zones while avoiding sources of false triggers like moving foliage.
- Adjust motion sensitivity and enable size-based filters to reduce false alerts from pets or environmental factors.
- Test zones during different times of day to ensure reliable detection across lighting and temperature changes.
What Are Motion Detection Zones?
Many modern security cameras let you define specific areas where motion triggers matter most, and these customizable sections are called motion detection zones. You can adjust them to ignore irrelevant movement, like trees swaying, while focusing on paths or doors. This helps reduce false alerts and saves storage space. Cameras with night vision guarantee these zones stay effective after dark, capturing clear footage in low light. Weather resistance is important if you place cameras outside, as it protects the lens and sensors from rain, snow, or extreme heat. These features work together to maintain reliable detection year-round. You’ll want a camera rated for outdoor use if mounting it on porches or eaves. Look for IP65 or higher ratings. When setting zones, keep them narrow and aim them at entry points. Avoid pointing at busy streets or windy plants. For optimal performance, choose models from the best outdoor security cameras list that combine smart zoning with robust environmental protection.
Pick Cameras That Support Custom Motion Zones
While not every security camera offers the same level of control, you’ll want to choose models that support custom motion zones so you can fine-tune where detection happens. Cameras with this feature let you define specific areas for motion alerts, reducing false alarms from trees or streets. Look for models with at least 1080p camera resolution so you can clearly identify people or vehicles in the footage. Higher resolution helps, but it also increases file size, so balance quality with your video storage capacity. Many cameras offer cloud storage or local SD card options-each has trade-offs in cost and accessibility. Cameras with smart detection often cost more upfront but save time and storage space by recording only relevant events. Check user reviews and specs to confirm zone customization is user-friendly. This guarantees you get reliable, efficient monitoring without cluttering your video storage with unneeded clips. A key factor in maximizing accuracy is selecting from the best indoor security cameras that offer advanced motion detection and customizable settings.
Find Key Spots to Watch on Your Property
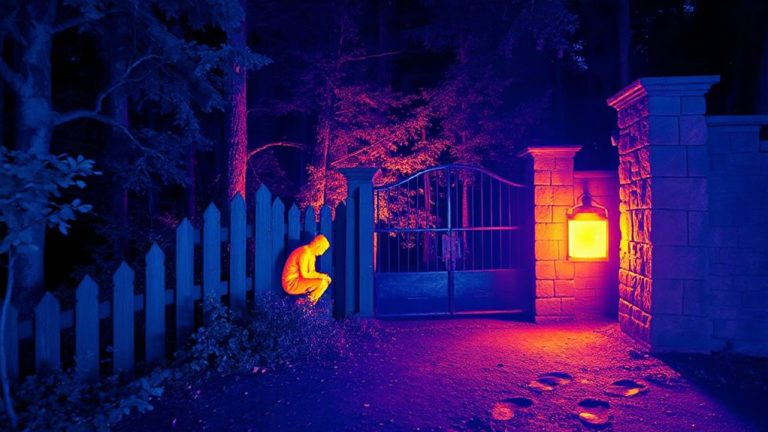
You’ve picked cameras with custom motion zones, so now it’s time to decide where they’ll do the most good. Start by walking your property and noting entry points like doors, windows, and garage access. These are common targets, so covering them reduces risk. Pay close attention to blind spots-areas hidden from street view or current camera coverage-where intruders often test weaknesses. Poor outdoor lighting creates more blind spots, especially at night, so position cameras where shadows gather, like side yards or behind sheds. Look for spots where lighting cuts off, as motion sensors work better with some illumination. Consider back corners, fences, and low-traffic zones that still offer access. Prioritize locations where motion detection adds value without excessive false alerts. A strategic layout improves detection accuracy and guarantees your system responds to real threats, not just passing animals or swaying trees. Models with advanced motion detection technology offer improved accuracy and fewer false alarms.
Draw Motion Zones in Your Security App
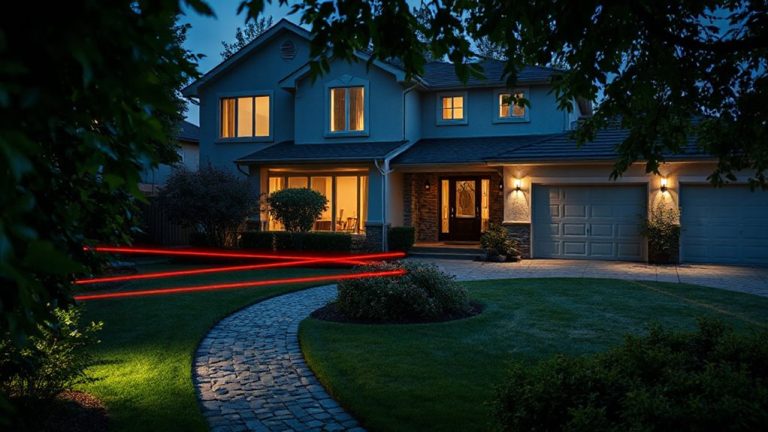
After placing your cameras in strategic locations, it’s time to fine-tune their motion detection by drawing custom zones in your security app. This step, known as zone calibration, lets you specify exactly where motion should trigger alerts, ignoring areas like busy streets or swaying trees. Most apps let you draw rectangles or polygons directly over the live view, making it simple to focus on driveways, doors, or backyards. Proper boundary optimization guarantees you capture relevant activity without overloading your system. You’ll reduce unnecessary clips and save storage, while increasing the odds of catching real threats. Some cameras support multiple zones with custom rules, so you can set higher sensitivity at entry points and lower it elsewhere. Remember, accurate zone setup now means better performance later-especially when integrating with smart alerts or recording schedules. Take time to review and adjust as your surroundings change.
Adjust Sensitivity to Stop False Alerts
Most security cameras let you adjust motion sensitivity, and getting it right can cut false alerts by up to 70%. You’ll want to fine-tune it so minor movements don’t set off alerts. High sensitivity often picks up light changes, like shadows shifting during sunrise or headlights at night, which adds unnecessary notifications. Lowering sensitivity helps filter that noise. If you have pets, adjust the settings so pet movement-like a cat walking by-won’t trigger the camera. Many systems let you set pet immunity or adjust detection zones based on size and motion patterns. Test different levels over a 24-hour period to see what works best. Too low, and you might miss real threats; too high, and false alerts pile up. Balancing sensitivity improves reliability, saving you time and keeping your focus on actual security events.
Connect Zones to Alerts and Recordings
Fine-tuning motion sensitivity helps reduce unwanted alerts, but setting up specific detection zones gives you even more control over how your camera responds. You can assign each zone to trigger alerts or recordings only when motion occurs in selected areas. This improves event filtering by ignoring irrelevant movement, like trees swaying outside your driveway. With alert customization, you decide which zones send push notifications, email alerts, or start video recording. For example, you might enable recordings only for the front walkMargins, not the street. Most systems let you create multiple zones with independent settings. That means you can prioritize high-traffic entry points while avoiding false triggers from pets or passing cars. Check your camera’s app for zone configuration options-many support up to four custom zones. Proper setup guarantees reliable monitoring without alert fatigue, giving you actionable data when it matters most.
Test and Fix Your Detection Areas
How well is your camera really seeing? Test each detection zone by walking through them while checking if triggers occur. Start at the edges and move toward the center, noting false alarms or missed motion. Poor results usually point to suboptimal camera placement or sensor calibration issues. If your camera overlooks activity, reposition it to reduce obstructions and improve field of view-avoid pointing toward windows or heat sources. Take time to fine-tune sensor calibration using your system’s app; adjust sensitivity to ignore pets or swaying trees. Repeat tests at different times to account for lighting or temperature changes. Accurate detection depends on both smart camera placement and precise sensor calibration. Fixing weak spots now guarantees reliable alerts later and saves storage space by recording only relevant activity.
On a final note
You’ll get the most from your security system by setting up motion zones that match your property’s layout. Focus on entry points like doors and driveways, adjust sensitivity to reduce false alerts, and use app tools to draw zones precisely. Link zones to alerts and recordings for smarter monitoring. Test each zone, then fine-tune for accuracy. Proper setup saves time, cuts unnecessary notifications, and strengthens overall home security with reliable, targeted detection where it matters most.